Setting Up TP-Link Routers for a NVR
Setup
Log in to the router via 192.168.0.1.
You can open a CMD command and type IPCONFIG, look for your gateway IP
Create a password for the TP-Link.
LAN and DHCP Settings
If the NVR is on a 192.168.1 network, go to the network LAN settings and change the IP address to 192.168.1.1, or use the SADP tool to change the IP address to 192.168.0.200.
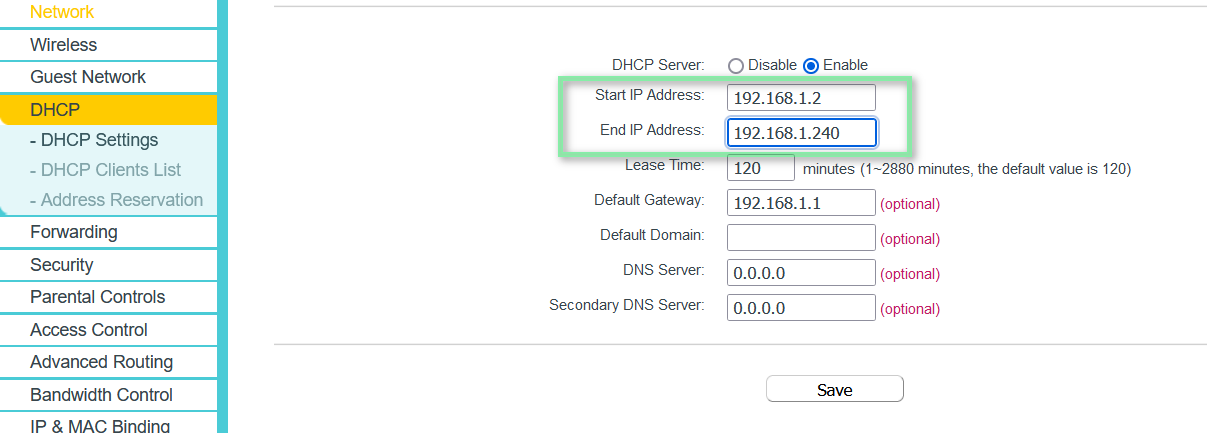
It's a good idea to change the DHCP settings to a range that starts at 192.168.X.2 and ends at 192.168.X.240. This change is necessary because some TP-Link routers may have issues with static IP addresses that don't fall within the specified range, causing problems with identifying the DHCP client list and UPnP.
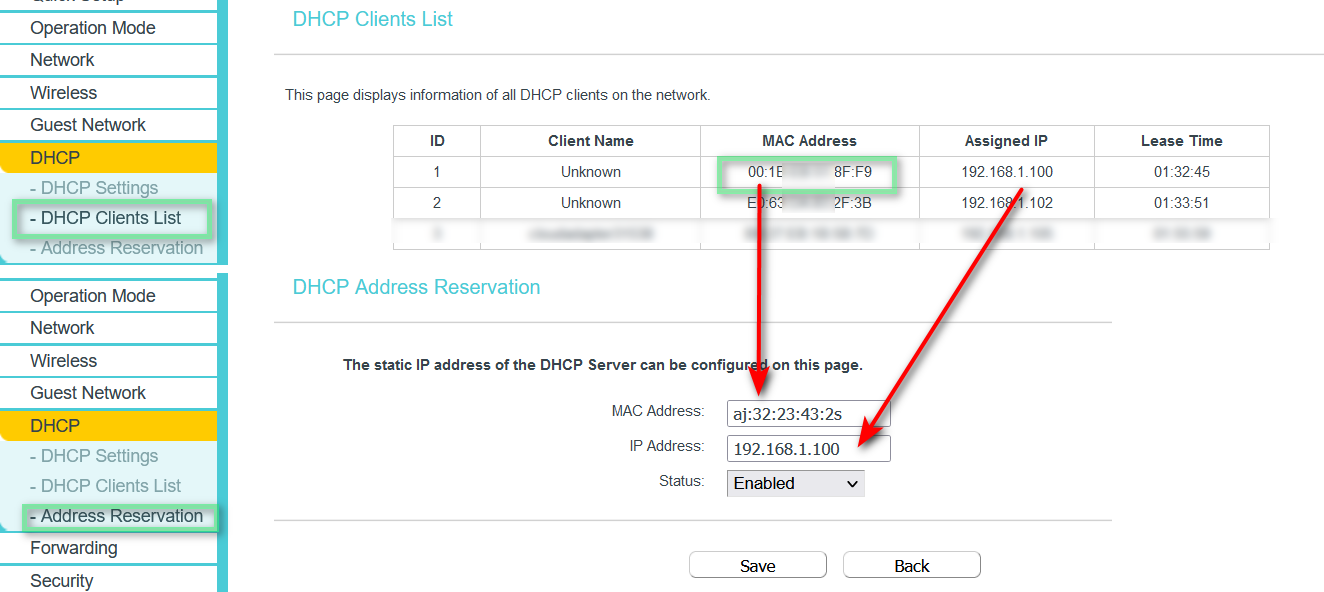
If you're using DHCP on the NVR for any reason, please go to the DHCP client list, copy your MAC address, and head to Address Reservation. Paste it in to ensure that the device will always have the given IP address, even in DHCP mode.
UPNP and Port Forwording
Verify that UPnP is running by going to Forwarding > UPnP. You should see a list of devices and ports.
Remote Managment
Depending on your router, go to Security > Remote Management and set the HTTP Port to 22000 and the Remote Management IP address to 255.255.255.255.
Dynamic DDNS
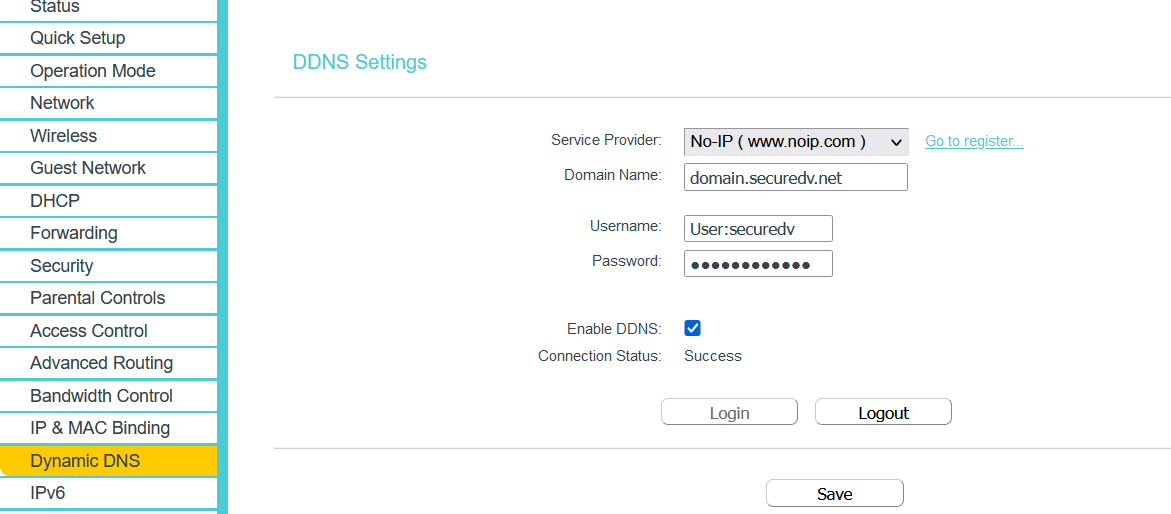
Head over to Dynamic DNS and enter your DDNS settings. If you're using groups, please use the format "Username: Company Name."
Go to canyouseeme.org and test all your ports.


